United States Navy — Submarine
USS Harder (SS-257) — service history
This is the full service history. For the vessel's particulars, photograph and specifications, see the entry.
In the words of the US Navy. The account below is reproduced verbatim from the Dictionary of American Naval Fighting Ships, compiled by the Naval History and Heritage Command — a work of the United States Government, in the public domain, and the only text on this site not written here.
Second World War 1939–1945
1941
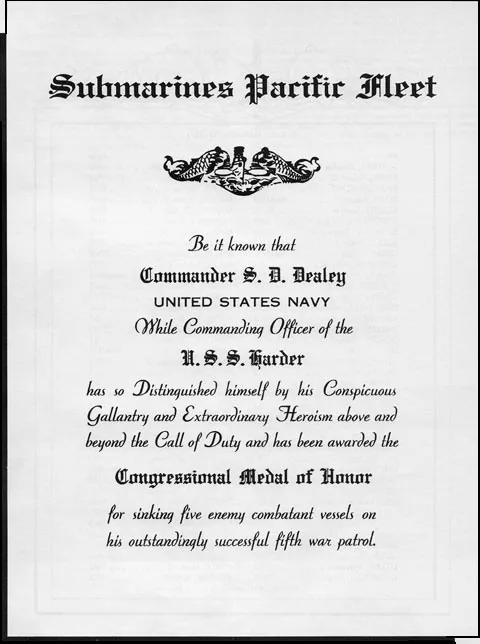
The first Harder (SS-257) was laid down on 1 December 1941 at Groton, Conn., by the Electric Boat Co.; launched on 19 August 1942; sponsored by Miss Helen M. Shaforth, daughter of Rear Adm. John F. Shafroth, Commander, Southeast Pacific Area; and commissioned on 2 December 1942, Cmdr. Samuel D. Dealey in command.
1943

April 1943
Following shakedown off the East Coast, Harder sailed for Coco Solo, Panama Canal Zone, on 26 April 1943. Steaming in a designated safe transit lane just after noon on 2 May, the submarine sighted a Navy PBY Catalina flying boat approximately five miles off her port beam. Unfortunately, the aircraft quickly turned and strafed the boat’s starboard side with its .30 caliber machine guns and dropped a bomb close aboard. Fortunate to escape the encounter, Harder moored at the Submarine Base, Coco Solo, two days later at 1425. On the morning of 8 May, the boat transited through the Panama Canal from 0955-1600 and subsequently moored at Pier No. 14, Balboa, Canal Zone, at 1645. After a night’s rest, the submarine made for Pearl Harbor, Territory of Hawaii, at 0945 the next morning. Harder tied up at Submarine Base, Pearl Harbor just after 1100 on 23 May 1943. Over the next two weeks, dockworkers altered the boat’s main engine exhaust valves, installed ready stowage for the submarine’s two .50 caliber guns and ammunition, before cleaning, painting and repairing the boat’s air tanks. After a three-day training period, the submarine was declared ready for duty.
June 1943
On 7 June 1943, Harder steamed out of Pearl Harbor at 1330 in company with the submarine Searaven (SS-196) and armed yacht Crystal (PY-25.) She dismissed both vessels and continued on alone en route to Midway Atoll at 2030. Throughout the 9-10 June, the submarine conducted fire control drills, surface battle drills, and tested the reception of her radio. The boat briefly refueled at Midway and made for her designated operations area on 11 June.
Aided by occasionally heavy rainsqualls, Harder entered her patrol area 0300 on 20 June 1943. Based on a study of previous patrol reports and a plot of enemy contacts, the boat submerged and began hunting near the intersection of two shipping routes a couple hours later. Unfortunately, during her first day’s patrol, the submarine only encountered a small patrol vessel at 1330.
As Harder closed to within 40 miles of the Japanese coast during the early morning of 21 June, watch standers detected the smell of eucalyptus trees and camphorwood. Her patrol report suggested that U.S. submarines “keep this ‘aid to navigation’ in mind when approaching [the Japanese island of] Honshu in reduced visibility.” The submarine crept to within six nautical miles of northern Honshu before she dove on course 270°T at 0438. Intending to make her way toward the southwest, the submarine unfortunately found herself unable to make headway against the strong Kuroshio current and turned southward toward Daiosake Lighthouse. As she neared her destination at 2300, the boat came to course 270° in an effort to avoid an enemy patrol vessel. A half hour later, the submarine detected a second enemy patrol craft 4,000 yards off her port beam. With the submarine steaming at 15 knots, the enemy ship was unable to close on the submarine and quickly gave up pursuit.
Harder subsequently worked her way inside a picket line and sighted a merchant convoy escorted by a single warship steaming 11,000 off her port bow at 0034 on 22 June 1943. She immediately went to battle stations and gave chase. Upon closing to within 4,000 yards the boat dove and began maneuvering into a firing position. At 0052, she closed to within 800 yards and fired four torpedoes at the 1,189-ton auxiliary oiler Kyoei Maru No.3 , but her first wartime shot exploded only 15 seconds into its run. However, at least one of the other three torpedoes hit and disabled the oiler. Unfortunately, the resulting explosion adversely affected Dealey’s night vision, preventing him from firing on a second enemy ship. Expecting a counterattack, the boat dove, swung to starboard, and rigged for depth charges. Unfortunately, she overshot her intended depth and slammed into the bottom of the ocean, severely damaging her JK-QC sonar. She remained motionless from 0110-0230 as a series of 12 depth charges exploded overhead. With “considerable difficulty,” Harder broke loose from the bottom a half hour later at 0300. Unfortunately, she only rose five feet before grounding a second time. The boat finally worked herself free, rose to 200 feet and proceeded southward at 0345. When the submarine finally came to periscope depth at 0900, she immediately sighted two enemy warships steaming 12,000 yards distant. Unfortunately, she was unable to close on her prey and quickly gave up the chase. Prompted by the sudden appearance of a floatplane at 1000, submarine once again dove to 200 feet, and remained there until she surfaced to charge her batteries at 2047.
At 0040 on 23 June 1943, Harder sighted a patrol craft proceeding on bearing 260°T, followed by a second vessel on bearing 315° at 0200, and a third on bearing 270°T five minutes later. Over the next hour, the three enemy ships attempted to “box in” the submarine, but did not attack. She finally maneuvered clear and set course 110° at 0300. Later at 0418, the boat sighted what she believed to be a large freighter steaming into Japan from Truk or Saipan. Unfortunately, when she had closed to within 2,500 yards her target, the auxiliary fleet replenishment vessel Sagara Maru , sighted her periscope, turned away and began firing. In response, the submarine fired torpedoes from her four bow tubes, with one striking the enemy ship, causing her to list 10° to port as she attempted to flee. Rather than risk an attack from shore-based aircraft, Harder chose not to give chase and finish off the damaged vessel. Shortly after the submarine departed the area, the Japanese destroyer Sawakaze arrived, took the stricken ship in tow and beached her 1.5 miles southwest of Kaketsuka Lighthouse, Shizuoka, Japan.
Harder sighted her third enemy ship of the day, a Chidori -class torpedo boat conducting a high-speed anti-submarine patrol at 1210. The boat briefly gave chase before concluding the use of torpedoes against such a small target was unjustified and breaking off pursuit at 1238. She unsuccessfully searched for a larger target for the next several hours before surfacing and working back toward the middle of her assigned patrol area at 2036.
Enroute to the waters off Daiosaki Lighthouse, Mie Prefecture, on the morning of 24 June 1943, Harder sighted a convoy of three cargo ships escorted by a patrol vessel at 0645. Over the next half hour, she slowly maneuvered ahead of the convoy before turning and bringing her stern tubes to bear. At 0715, the submarine fired four torpedoes, all of which missed. Alerted by torpedo tracks crossing their wake, the convoy quickly scattered, with one vessel turning toward the submarine. As the 1,915-ton Kizugawa Maru closed to within 1,500 yards at 0718, Harder fired torpedoes form her four bow tubes. Believing the concussion caused by the premature detonation of one of her torpedoes was an aerial bomb exploding close aboard, the submarine went deep to 200 feet and rigged for depth charges. Unfortunately, the only torpedo to strike its prey failed to explode and Dealey’s decision to dive allowed the entire convoy to escape unharmed. Harder eventually surfaced to charge her batteries at 2055.
As she patrolled the Japanese coastline on 25 June 1943, Harder steamed toward smoke on the horizon at 1520, encountering a three ship-convoy escorted by a patrol craft five minutes later. The submarine maneuvered ahead, closed to within 2,000 yards and fired four shots from her after tubes at the middle ship in the column at 1603, before quickly turning and firing three more torpedoes at the last ship in the formation. As she went deep to 300-350 feet, the submarine observed her initial target down by the stern, with the pilothouse already awash. The enemy escort quickly located and closed the American boat, dropping seven depth charges from 1627-1734, after which the boat came to course 180° and crept out of the area.
At 0412 the next morning, Harder dove and closed on the Japanese coastline, looking for any enemy vessels stranded or beached during her attack the previous day. Concerned with the echo ranging “spasmodic” depth charging she heard at 0715, the submarine worked her way out to sea over the next few hours. At 1514, she finally sighted her first convoy of the day, a lone freighter escorted by a patrol boat, hugging the Japanese coastline. Over the next 45 minutes, the boat unsuccessfully attempted to close the seven-mile range to her target and maneuver into a firing positon. Still two miles distant, Harder watched as the freighter rounded Cape Shionomisaki and proceeded northward at 1608. Still chasing her target a little over a half hour later, the submarine found the enemy patrol craft had turned and was quickly closing, forcing the boat to go deep and rig for silent running at 1642. Despite searching for over an hour, the enemy vessel did not attack. She finally came to periscope depth again at 1800. Later that evening, Harder sighted a Chidori -class torpedo boat at 1935, followed by a second less than ten minutes later. With only two torpedoes remaining and a low battery, Dealey deemed a potential attack on the two vessels “foolhardy,” and attempted to exit the area. Unfortunately, one of the enemy vessels turned and closed on her at 2005. The submarine once again went deep, rigged for depth charges, and with the carbon monoxide in the boat reaching 3.5 percent, slowly cleared the area. Harder finally surfaced to air out the boat and charge her batteries at 2253.
After two days of unsuccessful hunting the shipping lanes into Ise Bay, at 0429 on 29 June 1943 Harder dove on course 035° and attempted to work in close to the coast of Omaezaki, Japan. At 1135, the submarine sighted and closed on a ship bearing 043° seven miles distant. As she came to within 8,000 yards, the boat determined she had come across the beached Sagara Maru . At 1327 a quick periscope scan revealed two more tempting targets, an unescorted freighter proceeding south from Tokyo, and a three-ship convoy consisting of one cargo vessel and two oilers 7,000 yards off her port bow. Deciding that the beached maru “wasn’t going anywhere,” Harder chose to pursue the cargo ship at the center of the convoy. She crept to within only 800 yards before firing at 1341. Her first torpedo struck the merchant ship between her forecastle and bow. Approximately a minute and a half later, her second shot hit and damaged one of the oilers. Just before going deep to avoid an aircraft escorting the convoy, Harder sighted the cargo ship settling into the water bow down. As the submarine dove past 100 feet, an aerial bomb exploded close off her starboard quarter. Despite the explosion severely shaking the boat, she reported no significant damage. She surfaced again on course 165° en route to Midway at 2048.
On 30 June 1943, Harder sighted a small destroyer or patrol craft at 0509. Over the next two hours, the submarine determined the enemy vessel regularly patrolled a bottleneck between Hachijō-jima and a small island to the north on the same courses and speed, judging her a tempting target for the next submarine assigned to patrol the area.
July 1943
Escorted by a single unidentified U.S. aircraft Harder moored at Midway alongside Tinosa (SS-283) on 7 July 1943 at 1020. The submarine took on 18,000 gallons of fuel over the next several hours. Under an air escort, the boat got underway once again at 1800 alongside Hoe (SS-258). Her escorts departed and she set course for Hawaii alone just over an hour later at 1915. The submarine ended her patrol moored at Submarine Base, Pearl Harbor, on 10 July at 1142. In his assessment of her war patrol report, Vice Adm. Charles A. Lockwood, Commander, Submarines, Pacific Fleet, credited Harder with sinking three freighters totaling 15,437 tons, and damaging four more enemy vessels totaling 27,116 tons.
August 1943
From 10 July-18 August 1943, Harder underwent a refit from the tender Holland (AS-3.) The extensive modifications and repairs included the replacement of her damaged QC-JK sonar head, overhaul of both periscopes and No. 3 and 4 engines, installation of a true bearing indicator for her SJ radar, and the installation of an air conditioner in her conning tower. She subsequently underwent a four-day training period from 18-22 August.
Harder began her second war patrol 24 August 1943 from Pearl Harbor; and, after touching at Midway to refuel and offload her cargo of plants five days later, she headed for the Japanese coast. At 0725 on 4 September, she sighted a submarine believed to be Tarpon (SS-175) steaming 9,000 yards off her bow. Both boats sighted each other and dove simultaneously. Harder remained deep until 0900, whereupon she surfaced, fired a recognition signal and cleared the area at high speed.
September 1943
While off Honshu 9 September 1943, Harder detected and began tracking cargo ship Koyo Maru at 0142. As the merchant vessel closed to within 1,700 yards at 0438, the submarine fired three torpedoes from her bow tubes. Unfortunately, her prey simultaneously changed course, causing at least one of the torpedoes to pass ahead harmlessly. However, shortly thereafter, the ship felt a shock under her keel amidships, as a “dud” fired by Harder struck a coal bunker. Despite failing to explode, the torpedo caused extensive flooding. Taken undertow by Sawakaze at 1500, the maru sank at 35°23'N, 140°38'E at 1617.
A few minutes after she fired on the merchant vessel, Harder sighted her escort steaming dead ahead at only 2,000 yards. The boat quickly swung hard to starboard followed by shifting her rudder hard to port, passing the enemy warship only 1,200 yards abeam to port. Apparently unaware of the close encounter with an American boat, the Japanese vessel held her course and speed as the submarine headed for deep water at 20 knots.
The following evening at 1752, Harder sighted the cargo vessel Yoko Maru and a patrol craft steaming southward out of Tokyo Bay. Unable to close on the convoy while submerged, the boat broke off her attack until 1943 when reduced visibility permitted her to surface and give chase on three engines. She remained surfaced until she maneuvered into position directly ahead of her prey at 0045. At 0120, the boat fired three shots from her stern tubes from only 1,000 yards. Her second torpedo struck the enemy ship between her stack and stern. As she went deep, the submarine heard distinct “crunching” sounds as the maru broke apart. The boat remained at 300 feet as the patrol craft dropped nine depth charges, none of which exploded closer than 100 yards.
Continuing her patrol on 12 September 1943, Harder sighted five freighters rounding Cape Irōzaki from 1243-1505. Unfortunately, she was unable to maneuver into a successful attack positon against any of them. Several hours later at 2100, the submarine determined her “moonlight patrol” at periscope depth was unlikely to be successful, withdrew out to sea and surfaced to charge her batteries.
The following afternoon at 1401, Harder closed on two cargo ships and their trailing escort steaming approximately two miles off shore. Unfortunately, just before firing, a quick periscope sweep determined her target had “zigged” directly at her and closed to within 1,800 yards. The boat quickly proceeded ahead at full speed and maneuvered into positon for a stern tube shot. Just as she fired two torpedoes at approximately 1450, a Japanese aircraft dropped a bomb nearby. Both torpedoes missed their intended target, but fortunately, so did the bomb. Anticipating further enemy contact, Harder went deep, rigged for silent running, turned hard to starboard and made for deep water. Escorts kept the submarine down with a severe depth charge attack that lasted from 1456-1952. The boat was forced down once again when she detected an enemy aircraft flying only two miles distant at 2037. As the submarine steamed at 250 feet, the first of nine bombs exploded overhead at 2054. Prompted by the boat’s attempt to surface a second time at 0323, enemy aircraft haphazardly dropped bombs in her general vicinity for the remainder of the night, followed by a much more accurate attack using depth charges and bombs at 1120. Despite the presence of a formation of four enemy bombers flying only seven miles distant, Harder surfaced to recharge her batteries at 1946.
Submerged for 58 of the past 66 hours, during which she had been subject to the explosion of 59 depth charges or aerial bombs, the submarine surfaced and cleared the area at 2105.
On 19 September 1943 at 1652, Harder sighted the cargo ship Kachisan Maru escorted by a patrol vessel. Less than ten minutes later, the boat’s second shot fired from only 1,400 yards disintegrated her prey’s bow, sending it quickly to the bottom. Shortly after the submarine went deep at 1710, the enemy patrol craft began a 30-minute depth charge attack. Many of the eight explosions occurred quite close to the submarine, knocking paint off bulkheads. Rather than use her pumps to maintain a depth of 275-350 feet, the submarine’s crew shifted from one end of the boat to the other. The boat surfaced for the night in the midst of heavy seas 12 miles south of Cape Shionomisaki at 2131. Unable to control the boat at periscope depth, and doubtful her torpedoes would successfully hit their target in 20-30 foot seas, Harder remained submerged for most of the following two days.
The return of calm seas on 22 September 1943 permitted Harder to set course for the coastline near Daiosake Light at 0555. Late that afternoon at 1648, she sighted an unescorted two vessel merchant convoy steaming 8,000 yards distant. She quickly closed to within 2,000 yards and fired her three bow tubes at a Japanese tanker. Once again, the torpedo tracks clearly indicated her shots passed underneath the target. While admitting her angle was poor and she fired at a lengthy range, Harder ’s patrol report remarked, “torpedo performance (or exploder mechanism) is held in suspicion on this approach.”
Immediately after the submarine lowered her periscope at 1717, a bomb dropped by an unseen aircraft exploded overhead, jamming the boat’s 20-milimeter gun, knocking out the boat’s communications system and shattering several light bulbs. Four more bombs exploded further away as the boat went deep and retired to the southwest. The next day, the submarine sank the 4,500-ton freighter Kowa Maru, and the 5,800-ton tanker Daishin Maru off Nagoya Bay.
Unfortunately, two more “duds” spoiled Harder ’s 28 September attack on a large convoy of five merchant cargo ships. With her torpedoes expended, the submarine turned eastward. Two days later, she opened fire on two armed trawlers with her 3-inch gun at 1740. Over the next 20 minutes, the submarine scored multiple hits on both ships before they attempted to escape behind a smoke screen and break off the engagement at 1800. However, by keeping both enemy targets westward and maneuvering just beyond their range, the submarine retained the advantage despite the smoke screen and difficult lighting conditions. After the boat finally exhausted her 3-inch ammunition, she ended the engagement by firing one magazine of 20-millimeter ammunition at 1912. After touching at Midway to refuel, Harder moored in Pearl Harbor on 8 October. Two days later, the tender Griffin (AS-13) began an extensive refit of the submarine. Most significantly, the lookout platforms on the bridge were altered and the railings removed, and a new QC-JK sound head and No. 2 periscope were installed.
Sighting a large enemy convoy at 0200 on the morning of the 19th, she radioed her companions and closed for attack. At 0537, two torpedoes fired from Harder ’s bow tubes struck the passenger cargo ship Hokko Maru , which sank at 22°27'N, 147°15'E. Five minutes later, the submarine fired three shots from her stern tubes, which hit the 3,900-ton Udo Maru amidships. Despite multiple salvage attempts by the Japanese, the ship sank later that afternoon.
At 2246, Harder fired four shots at 6,000-ton Nikko Maru , but all ran under the intended target. Undeterred, the submarine surfaced and began an “end run” around her target at full speed. She submerged and began her second attack run shortly after midnight. Positioned only 1,000 yards ahead of the ore carrier, she fired three torpedoes from her bow tubes, scoring two hits. A brave, but doomed, enemy crew kept the enemy ship afloat until Harder had expended all torpedoes, many of which ran erratically. Rough weather finally sank the damaged maru at position 22°47'N, 147°20'E.
November 1943
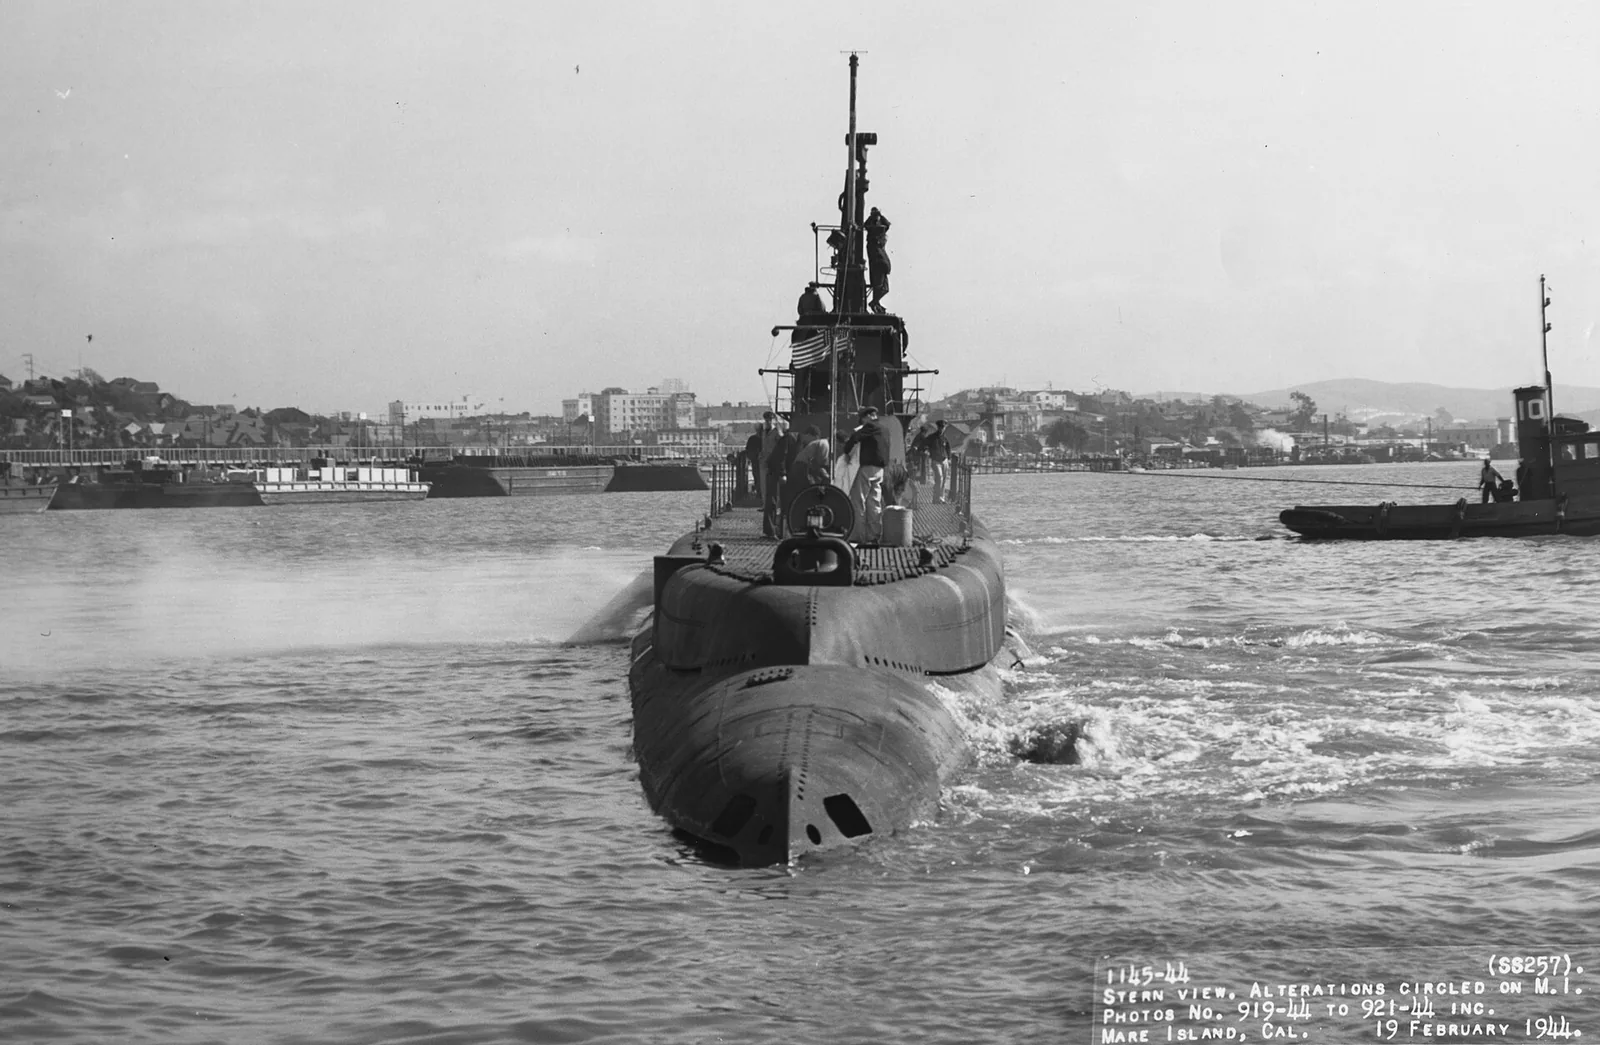
Harder returned to Pearl Harbor on 30 November 1943, and then sailed to Mare Island Navy Yard, Vallejo, Calif., for overhaul. While in the yard (12 December 1943-19 February 1944), workers replaced Harder ’s problematic double-acting Hooven-Owens-Rentschler main engines with the General Motors Model 16-278A, installed a 4-inch gun in place of her original 3-incher, modified her torpedo rooms for Mk. 18 torpedoes and raised her No. 1 periscope to a newly extended air conditioned conning tower. Her crew was undoubtedly also pleased with the installation of an electrical ice cream freezer.
1944 Philippine Sea
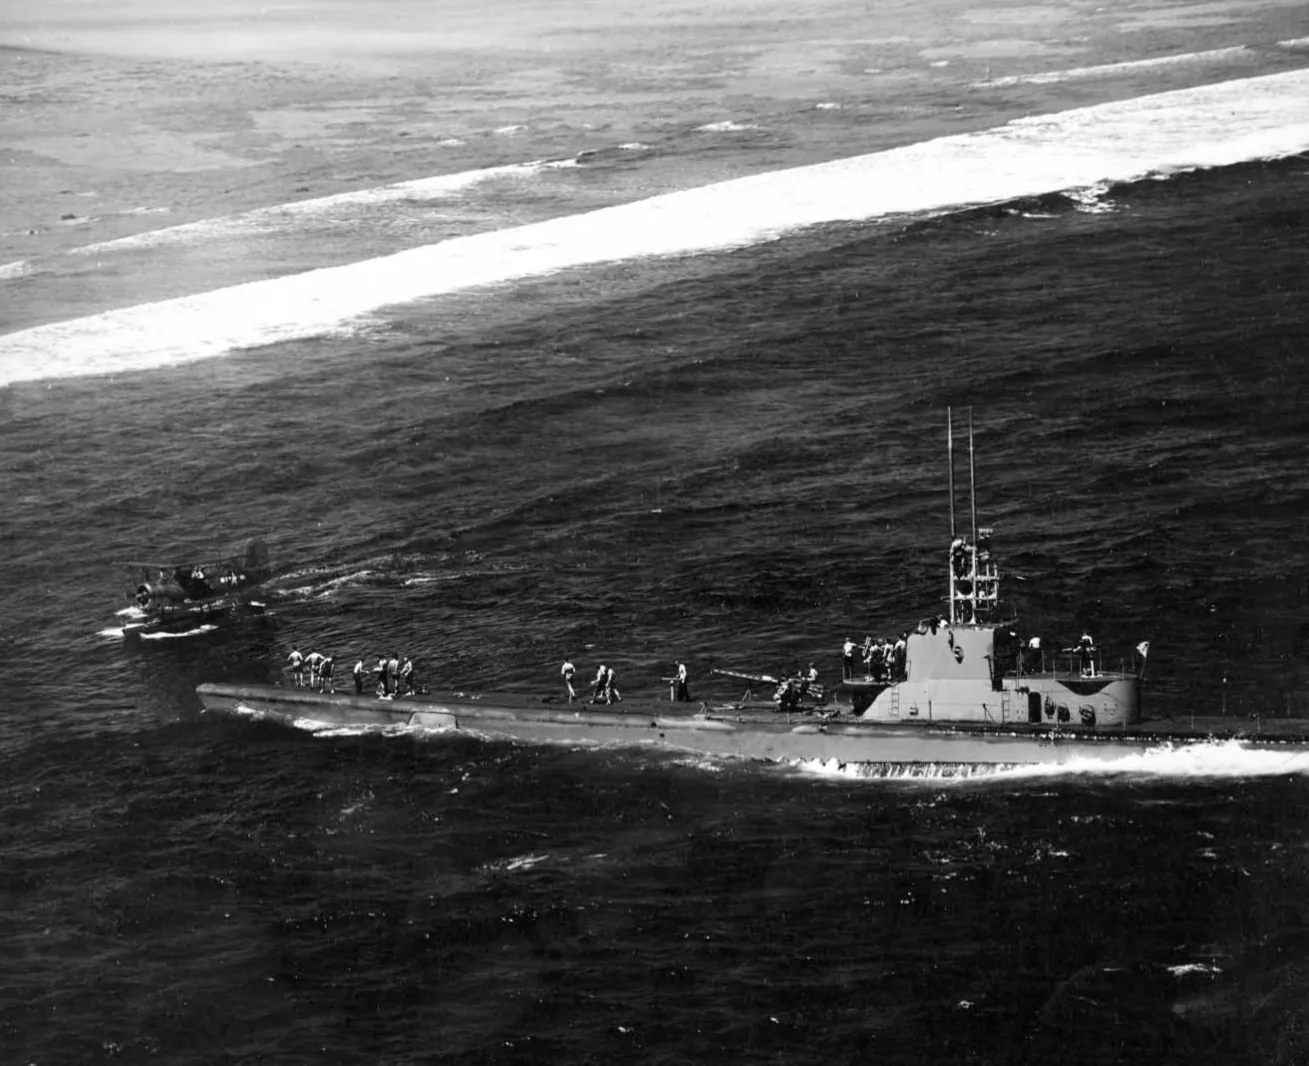
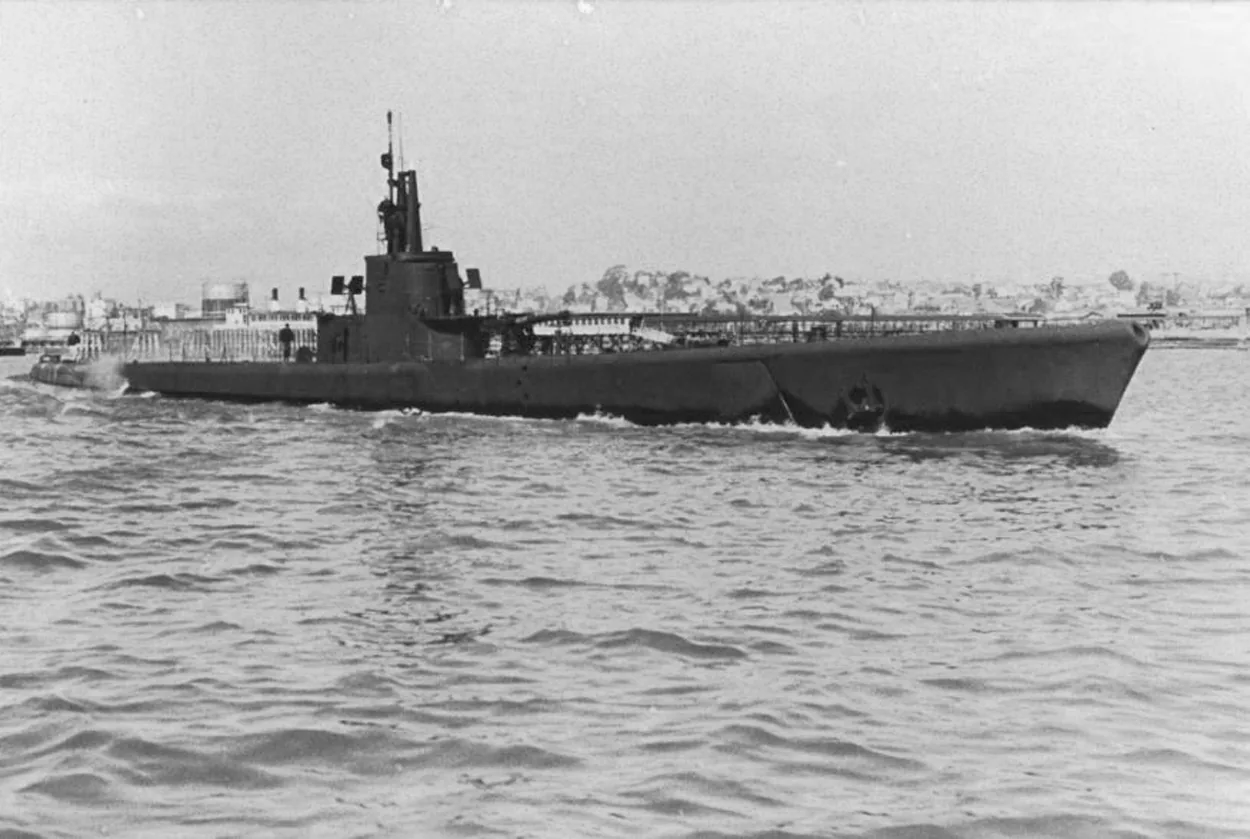
Returning to action in the Pacific, Harder reached Pearl Harbor on 27 February 1944, where she underwent additional pre-deployment repairs. Most significantly, the bearings on both of her periscopes were renewed, a new identification friend or foe (IFF) system was integrated into her SD radar, and a new twin 20-millimeter gun replaced her original single-mount, which was moved to a location aft of the bridge.
Following an eight-day training period, Harder departed on her fourth war patrol on 16 March 1944 in company with Seahorse (SS-304) enroute to Johnston Atoll. The two submarines briefly moored there two days later and took on fuel. The two boats parted company on 26 March, with Harder headed for the Caroline Islands. She arrived on station four days later and began a reconnaissance patrol off Woleai Atoll at 0923. Over the next several hours, the submarine confirmed the presence of a newly constructed enemy airstrip on the island. Unfortunately, her attempt to pass this information along to ComSubPac on 30 March proved unsuccessful. The following morning at 0959, a bomb dropped by an unseen enemy aircraft exploded close aboard, shattering several light bulbs and knocking out the bridge communications system.
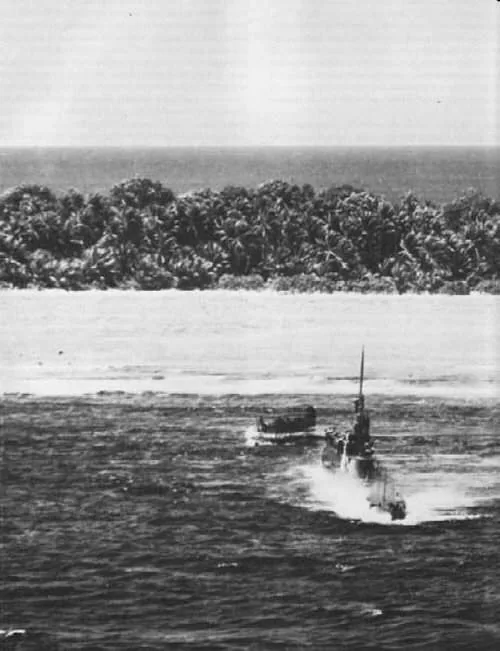
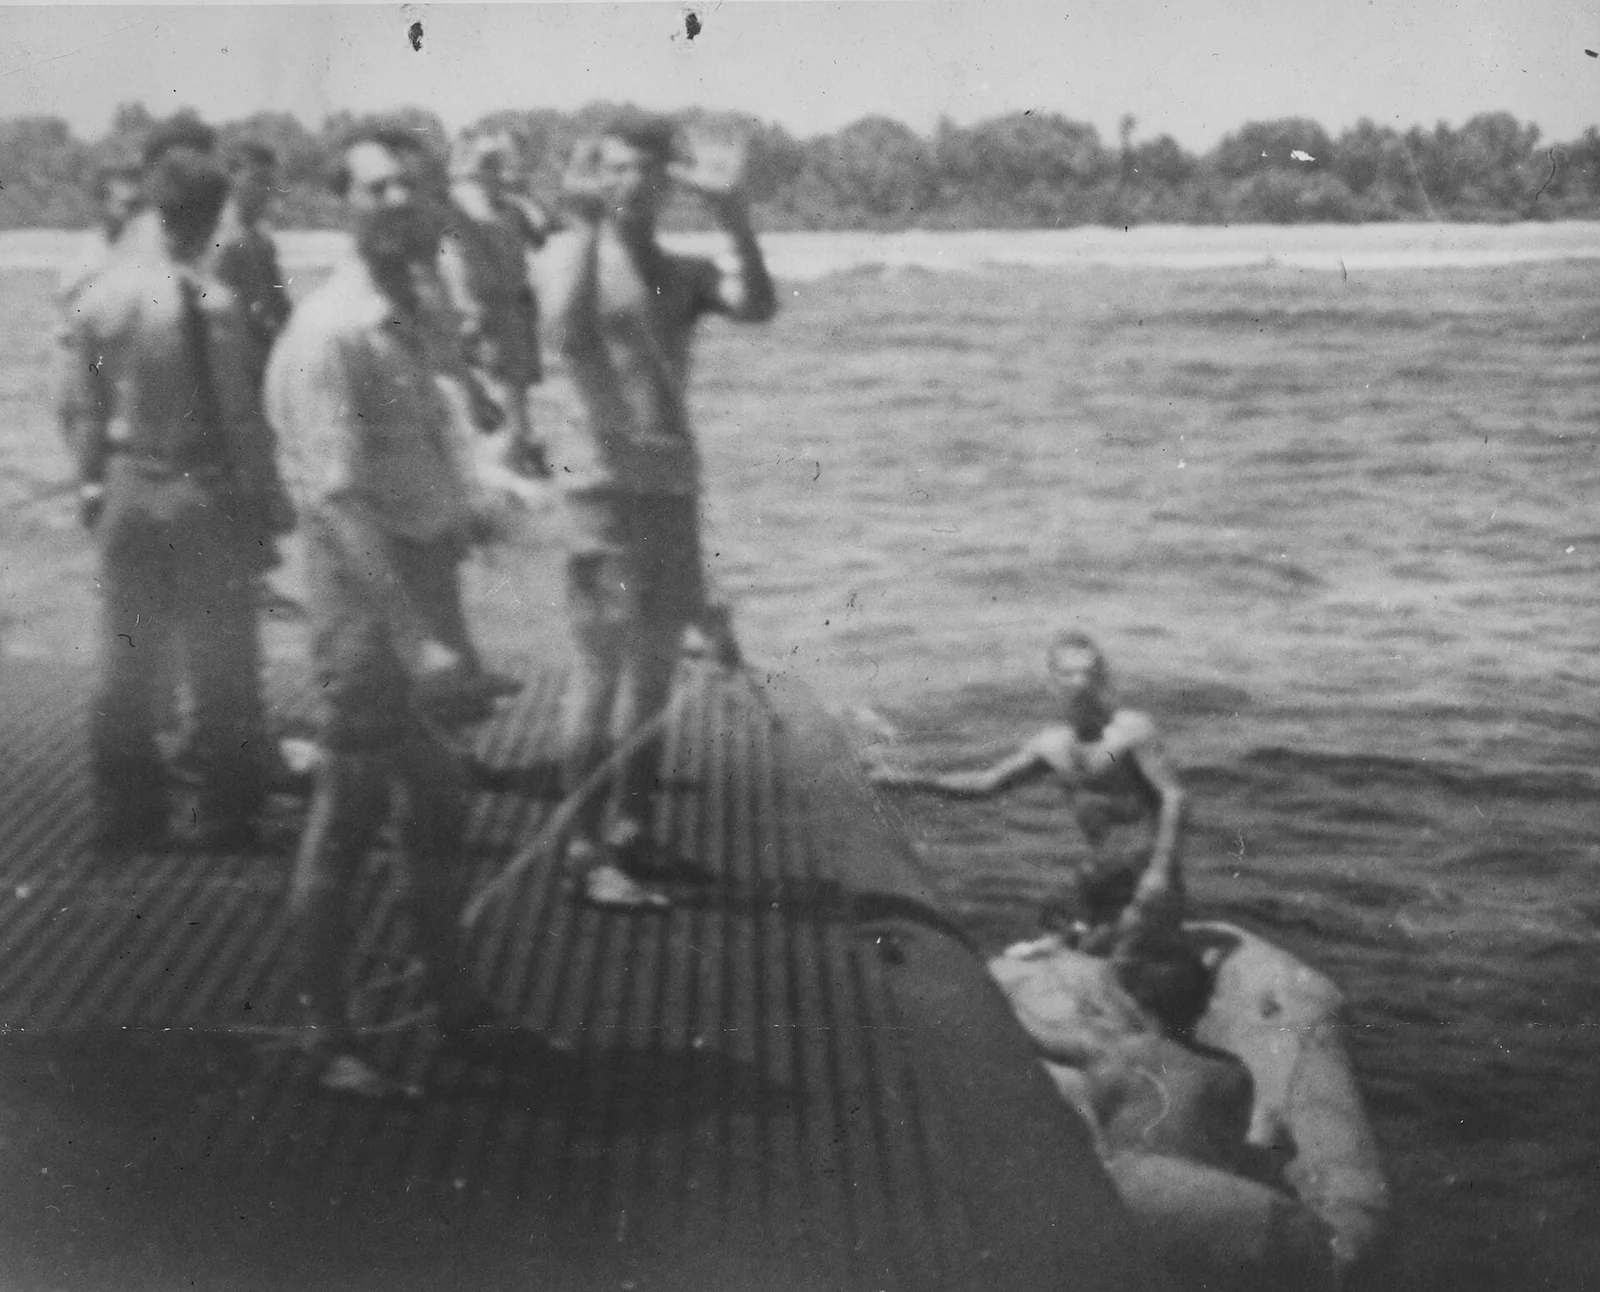
At 0840 on 1 April 1944, an overflying U.S. aircraft notified Harder of a downed pilot in the area. Guided by a fighter escort, the submarine sighted the airman standing on the northwestern tip of an unnamed island west of Woleai at 1145. Shortly thereafter, the submarine manned surface battle stations and nosed against a reef approximately 1,200 yards off the beach. With her hull scraping the bottom, the boat maintained her position with both screws as Lt. Samuel M. Logan, MoMM1c Francis X. Ryan and SC1c “J” “W” Thomason went over the side and began pushing and towing a rubber boat tethered to the submarine toward the beach. As they did so, an overflying aircraft dropped a rubber boat, into which Lt. (j.g.) John R. Galvin, A-V(N), USNR, from Fighting Squadron 8 in Bunker Hill (CV-17) , climbed and attempted to paddle out against the tide. After approximately a half hour of wading and swimming, Lt. Logan and MoMM1c Ryan finally reached the exhausted pilot. Unfortunately, apparently unaware of the ongoing rescue attempt, an American floatplane landed and inadvertently severed the line between Harder and the rubber raft. Fortunately, GM1c Freeman Paquet Jr. was able to bring a second line to the stranded sailors. Despite Japanese snipers, boiling shoals, and the precarious position of the submarine, the daring rescue succeeded, and the intrepid boat returned to the open sea; subsequently, Lt. Logan, MoMM1c Ryan, SC1c Thomason, and GM1c Paquet each received the Navy Cross
Three days later, at 0826, Harder spotted a merchant ship escorted by two destroyers and an aircraft. Wary of enemy air cover, the submarine slowly stalked the convoy for nearly a full day. Firing four torpedoes at 0335 on 17 April 1943, she sank 7,000-ton Matsue Maru . Then, adding to the enemy's misery, she returned to Woleai where she surfaced on the morning of 20 April and briefly bombarded the island’s airstrip from 0627-0634. Low on fuel, the submarine departed the area at 0845.
As Harder steamed westward on 23 April 1943, she sighted and exchanged “good wishes” with Blackfish (SS-221) at 0630. At 1315 the following afternoon, the submarine briefly investigated an overturned 20-foot boat floating at 03°37'N, 128°38'E. Unable to right the small craft, the submarine pulled clear and rammed it at 15 knots. She completed the patrol and moored alongside Orion (AS-18) off Fremantle, Australia on 3 May.
Ordered to patrol the waters off Tawi-Tawi, Mindanao, Harder departed Fremantle at 1300 on 26 May 1944 in company with Redfin (SS-272) en route to Exmouth Gulf, Western Australia. Shortly after arriving at her destination at 0800 on 29 May, the submarine took on 8,000 gallons of fuel from 1003-1316, followed by a surface battle drill at 1405. She cleared the area and proceeded independently toward her assigned station at 0200 the following morning.
On 6 June 1944, Harder entered the heavily patrolled Sibutu Passage between Tawi-Tawi and North Borneo and encountered a convoy of three tankers and two destroyers at 1930. She gave chase on the surface but was illuminated by the moon. As the 1,500-ton destroyer Minatsuki turned to attack, Harder submerged, turned and fired three torpedoes at a range of 1,100 yards at the onrushing enemy at 2159. Two struck the destroyer and exploded, sinking her within five minutes. At 2217, the boat’s radar detected a second destroyer rapidly closing from 14,000 yards. Rather than run, Harder turned and closed on the enemy. At a range of only 1,250 yards, the submarine fired her six bow tubes at 2242. Unfortunately, the enemy ship skillfully avoided all of them, forcing the boat to go deep to 400 feet and rig for depth charges. Fortunately, sea conditions enabled the submarine depart the area and avoid the attack, which lasted until midnight.
At 1134 the next morning, Harder sighted another destroyer steaming 4,000 yards distant. As before, Harder took the initiative. At only 650 yards, the boat fired three torpedoes, striking Hayanami amidships, one apparently detonating the ship’s magazine with a tremendous explosion, sinking her a minute later. Following the inevitable depth charge attack, Harder transited the Sibutu Passage after dark and steamed to the northeast coast of Borneo.
At 1940 on 7 June 1944, Harder surfaced and proceeded toward the Borneo coastline at one-third speed. As the boat came to rest, her hull scraping the bottom only 6,000 yards off the beach, TM1c Vincent L. Dallessandro and TM2c William F. Young assisted Australians Maj. William T. Jenkins and Sgt. Stanley W. Dodds with the assembly and loading of two folding canoes. Guided by information from Harder ’s radar passed via walkie-talkie, the two Aussies proceeded toward the coastline at 0940. A little over two hours later, they retrieved a party of six special operations troops from the Australian Special Reconnaissance Department’s Z Unit. Aided by outboard motors, the group returned to the boat at 0130.
That evening Harder sighted two enemy destroyers patrolling the narrowest part of the passage, just six miles from Tawi-Tawi. After submerging, she made an undetected approach and at 1,000 yards fired four torpedoes at the overlapping targets. The second and third torpedoes blasted destroyer Tanikaze; she sank almost immediately, her boilers erupting with a terrific explosion. Soon afterward, the submarine underwent the inevitable depth charge attack then she set course for a point south of Tawi-Tawi to reconnoiter.
Harder reconnoitered Tawi-Tawi anchorage on 11 June 1944 and sighted additional enemy cruisers and destroyers. At 1600, she headed for the open sea and that night transmitted her observations, which were of vital importance to Adm. Raymond A. Spruance's fleet prior to the decisive Battle of the Philippine Sea. Harder steamed to Darwin, Australia on 21 June for additional torpedoes, and, after patrolling the Flores Sea south of the Celebes, she ended the patrol at Darwin on 3 July.
Harder, accompanied by Hake (SS-256) and Haddo (SS-255) departed Fremantle on 5 August 1944 for her sixth war patrol. Assigned to the South China Sea off Luzon, the wolfpack headed northward. On 21 August, Harder and Haddo joined Ray (SS-271) and Guitarro (SS-363) in a coordinated attack against a convoy off Paluan Bay, Mindoro. The Japanese lost four passenger-cargo maru s, although none at Harder ’s hands.
Early the next day, Harder and Haddo attacked and destroyed the escort ships Matsuwa and Hiburi . Joined by Hake that night, they headed for Caiman Point, Luzon. At dawn on 23 August 1944, Haddo attacked and fatally damaged Asakaze off Cape Bolinao. Haddo, her torpedoes expended, left the wolfpack for replenishment at Biak.
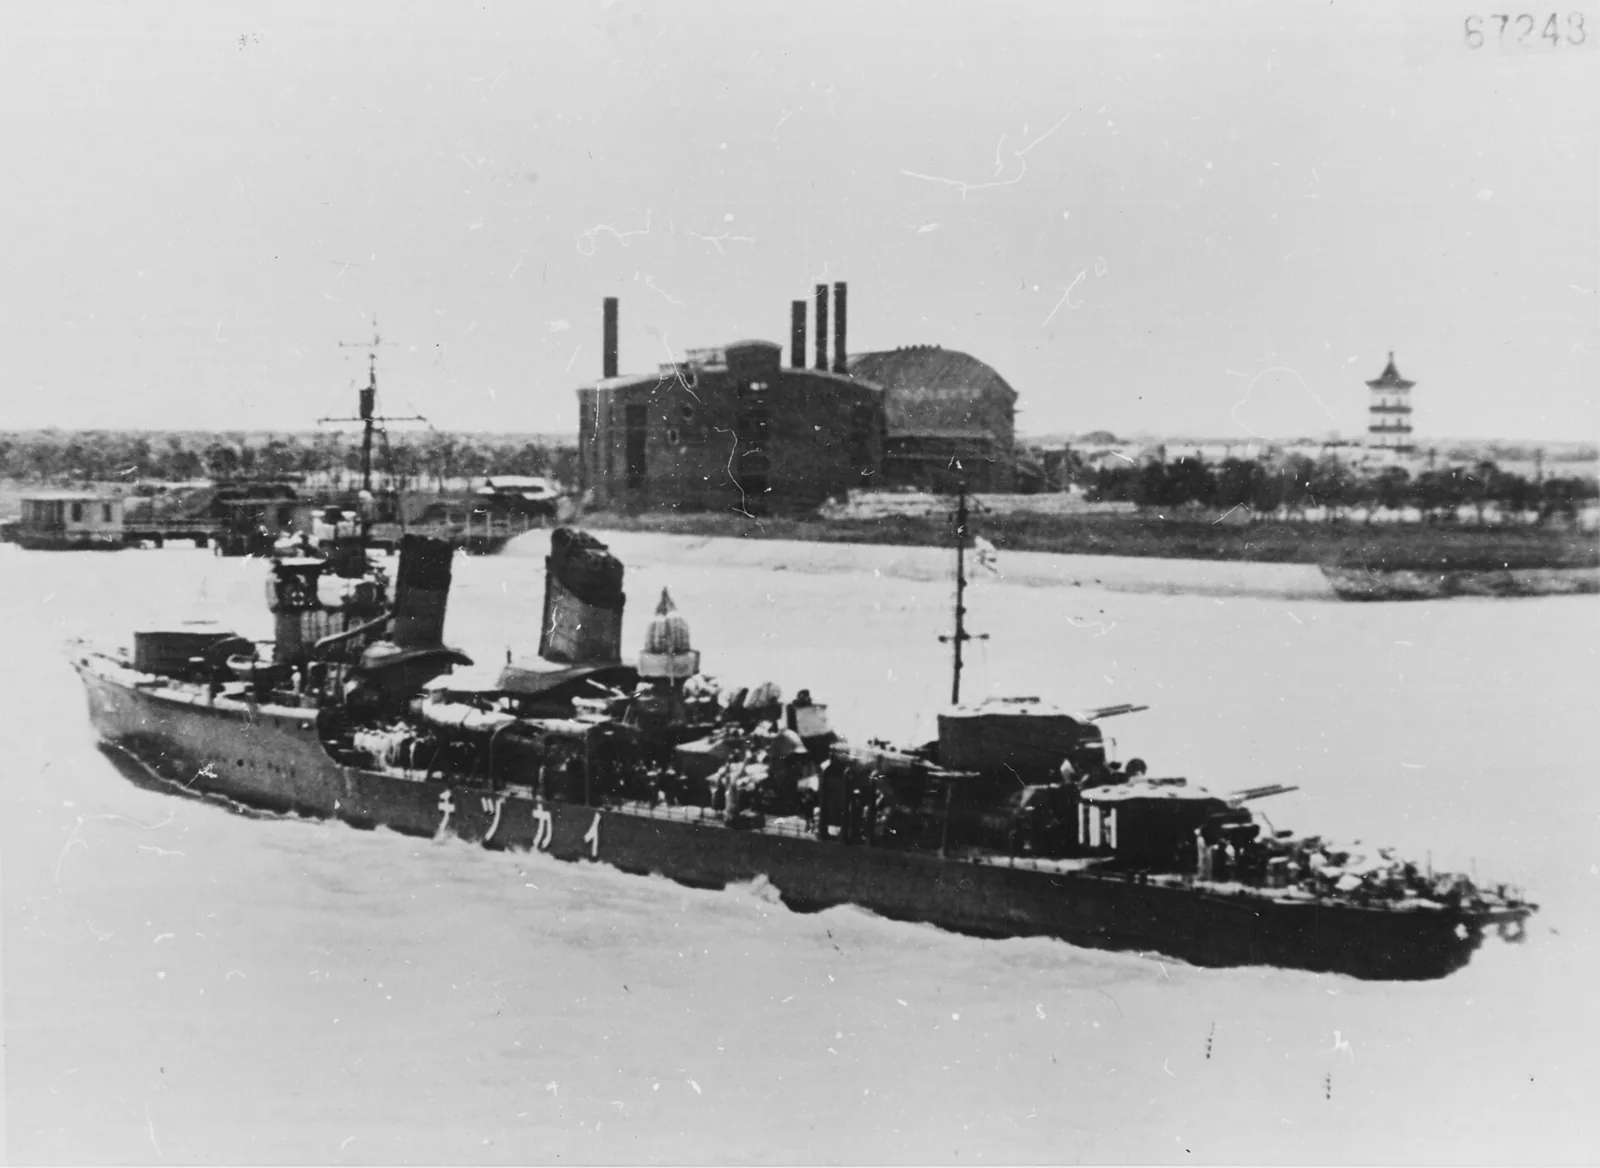
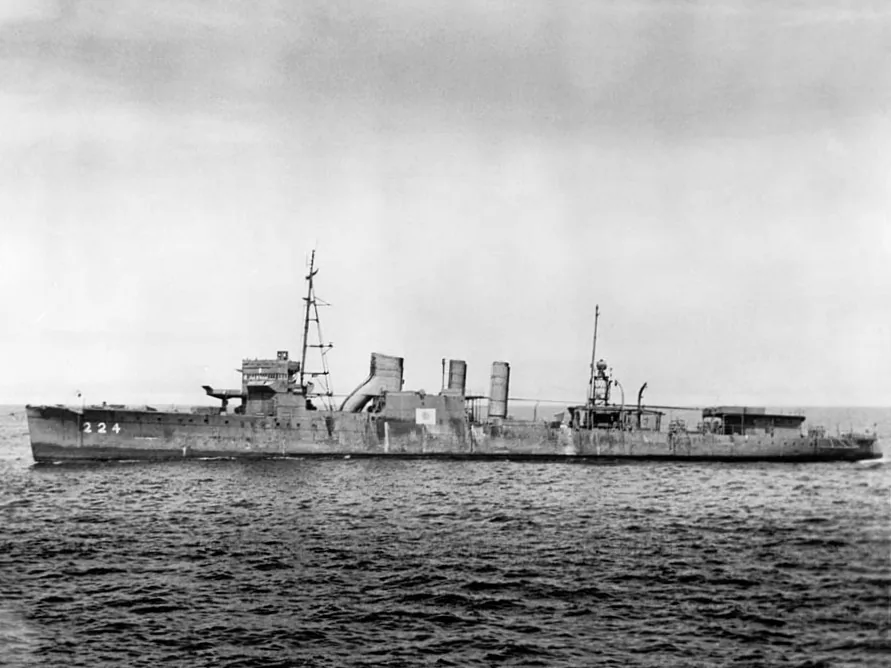
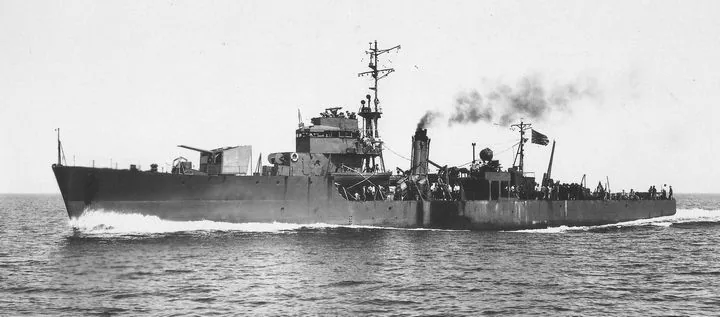
Before dawn on 24 August 1944, Hake sighted the escort ship CD-22 and Patrol Boat No. 102 (ex- Stewart , DD-224.) As Hake closed to attack, the patrol boat turned away toward Dasol Bay. Hake broke off her approach, turned northward, sighting Harder's periscope 600 to 700 yards dead ahead. Swinging southward, Hake sighted CD-22 about 2,000 yards off her port quarter. To escape, Hake went deep and rigged for silent running. At 0728 Hake ’s crew reported hearing 15 rapid depth charges explode in the distance astern. Hake continued evasive action, returning to the attack area shortly after noon to sweep the area at periscope depth – only finding a ring of marker buoys covering a radius of one-half mile. Japanese records later revealed that Harder fired three torpedoes at CD-22 in a “down-the-throat” shot, which the enemy vessel successfully evaded. At 0728, she launched the first of several depth charges, which sunk the American submarine.
In late 2023, the Lost52 Project, a research team led by explorer Tim Taylor, located and non-intrusively documented the wreck site they believed to be Harder . The NHHC Underwater Archaeology Branch reviewed their findings and confirmed the discovery and identification of the site as the final resting place of Harder . Resting at a depth of more than 3,000 feet, the vessel is well preserved and sits upright on her keel relatively intact except for the depth-charge damage aft of the conning tower.
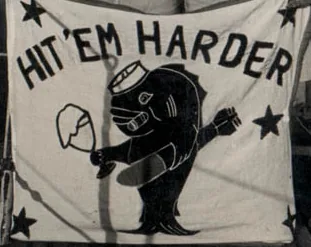
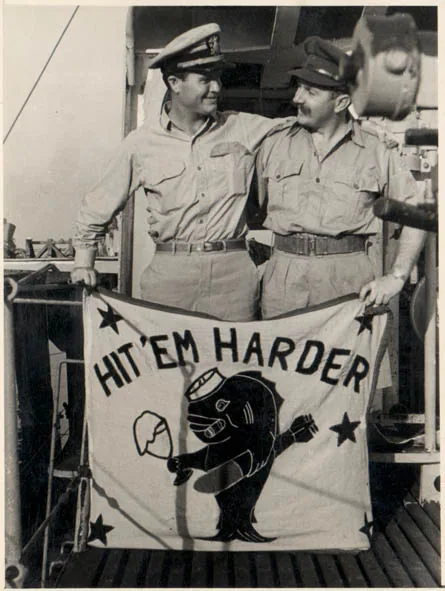
Harder received the Presidential Unit Citation for her first five patrols, and all six were designated successful. During his career, Cmdr. Dealey received the Navy Cross with three Gold Stars and the Distinguished Service Cross. He was posthumously awarded the Medal of Honor and a Silver Star.
Other photographs
Held for this vessel, and not tied to any part of the account above.


References
Every work this entry draws on. There are no numbered markers in the text above: what we hold is the provenance of the page — this history, this article, these photographs.
- History Harder I (SS-257) Dictionary of American Naval Fighting Ships, Naval History and Heritage Command. A work of the United States Government, in the public domain — the only text on this site reproduced verbatim.
- Facts USS Harder (SS-257) Structured facts only — dates, dimensions, armament and fate. No wording is taken from it. Harvested 1 August 2026.
- Photograph USS Harder;0825713 Unknown author — Public domain — Wikimedia Commons
- Photograph USS Harder (SS-257) rescueing pilot at Woleai 1944 Air Group Commander Andrew Jackson, U.S. Navy — U.S. Navy National Museum of Naval Aviation photo No. 2007.084.001.171 — Public domain — Wikimedia Commons
- Photograph Japanese destroyer Ikazuchi;h74173 Unknown author — Photo #: NH 74173 in Naval History and Heritage Command — Public domain — Wikimedia Commons
- Photograph USS Stewart (DD-224) U.S. Navy — Official U.S. Navy photo 80-G-702833 from the U.S. Navy Naval History and Heritage Command — Public domain — Wikimedia Commons
- Photograph Japanese escort ship CD-22 1944 Imperial Japanese Navy — ベストセラーズ刊『写真日本海軍全艦艇史』 — Public domain — Wikimedia Commons
- Photograph 0825721 Harder US Navy photo # MI-1148-44 — https://www.navsource.net/archives/08/08257.htm — Public domain — Wikimedia Commons
- Photograph Harder and Seagull Cdr Andrew Jackson/ US Navy — https://www.navsource.net/archives/08/08257.htm — Public domain — Wikimedia Commons
- Photograph Harder in the Mare Island USN photo # 919-44 — https://www.navsource.net/archives/08/08257.htm — Public domain — Wikimedia Commons
- Photograph Harder's Hit 'em harder flag USN photo — https://www.navsource.net/archives/08/08257.htm — Public domain — Wikimedia Commons
- Photograph Hit 'em harder USN photo — https://www.navsource.net/archives/08/08257.htm — Public domain — Wikimedia Commons
- Photograph USS Harder (SS-257) underway in the Pacific Ocean, circa 1 April 1944 (NNAM.2007.084.001.167) Unknown author — U.S. Navy National Naval Aviation Museum photo NNAM.2007.084.001.167 — Public domain — Wikimedia Commons
- Photograph WWII “Hit ‘em HARDER” submarine wreck site confirmed (8427586) U.S. Navy NHHC by 2nd Lt. Mary Andom — This image was released by the United States Navy with the ID 240542-N-NH433-1001 (next) — Public domain — Wikimedia Commons
- Photograph WWII “Hit ‘em HARDER” submarine wreck site confirmed (8427622) U.S. Navy NHHC by Monica Mccoy — This image was released by the United States Navy with the ID 240523-N-NH433-1003 (next) — Public domain — Wikimedia Commons
- Photograph WWII “Hit ‘em HARDER” submarine wreck site confirmed (8427623) U.S. Navy NHHC by Monica Mccoy — This image was released by the United States Navy with the ID 240523-N-NH433-1004 (next) — Public domain — Wikimedia Commons
- Photograph WWII “Hit ‘em HARDER” submarine wreck site confirmed (8427647) U.S. Navy NHHC by 2nd Lt. Mary Andom — This image was released by the United States Navy with the ID 240523-N-NH433-1005 (next) — Public domain — Wikimedia Commons
- Photograph WWII “Hit ‘em HARDER” submarine wreck site confirmed (8427759) U.S. Navy NHHC by 2nd Lt. Mary Andom — This image was released by the United States Navy with the ID 240523-N-NH433-1006 (next) — Public domain — Wikimedia Commons